20 Steps to Moving a Tiny Home

This article has been reviewed in accordance with our editorial policy.

As tiny houses rise in popularity so do questions and concerns about them. Here I am going to tackle everything you need to know about moving your tiny house.

What do you need to move your tiny house? Before moving your tiny home, make sure your truck is upgraded to tow something that heavy, your house is prepared, and the route is picked out. Let’s look at how to do all of these and what else to look out for.

My husband and I have been living tiny for almost 4 years now and we have moved our tiny homes from Vegas to Utah to Virginia to the Pacific North West to Montana to Nevada. We have had a lot of experience with moving tiny houses and have seen people do it the wrong way, damaging their truck or home.

If you plan on moving your home please read this page in its entirety, to avoid damaging your property. However, if you have an oversize tiny house and are wanting someone else to move your home, then go to my other post here for more information. You do need a special license to haul an oversize load, unless you have this you will need to hire someone else.

Your Truck

The first thing you need to consider when towing anything over 10,0000 lbs (4530 kg), is your truck. We have seen people blow their engines thinking their small truck could pull a tiny house.

Make sure your truck can handle the tow before you begin. You can do this by looking up the manufacturer’s specs online to see your truck’s tow capacity. To get a good idea of how much your tiny home will weigh, check out my post on the sizes and weights of tiny homes here.

Here is a complete list of things to consider before pulling a heavy tiny home.

1. Upgrade Hitch and Ball

Most hitches and balls are only rated for around 10,000 lbs (4530 kg), if you are towing something heavy this will need to be upgraded. I would recommend going with at least 20,000 lbs (9060 kg) unless you know the exact weight of your house.

To get a good idea of your tiny home’s weight, check out my post on sizes and weights here.

Cost:

Upgraded Hitch: Around $400-$500 in America

Larger Receiver: Around$400-$500 in America

Heavy Duty Ball: About $50

Total: $850-$1,050

2. Get Sway Control

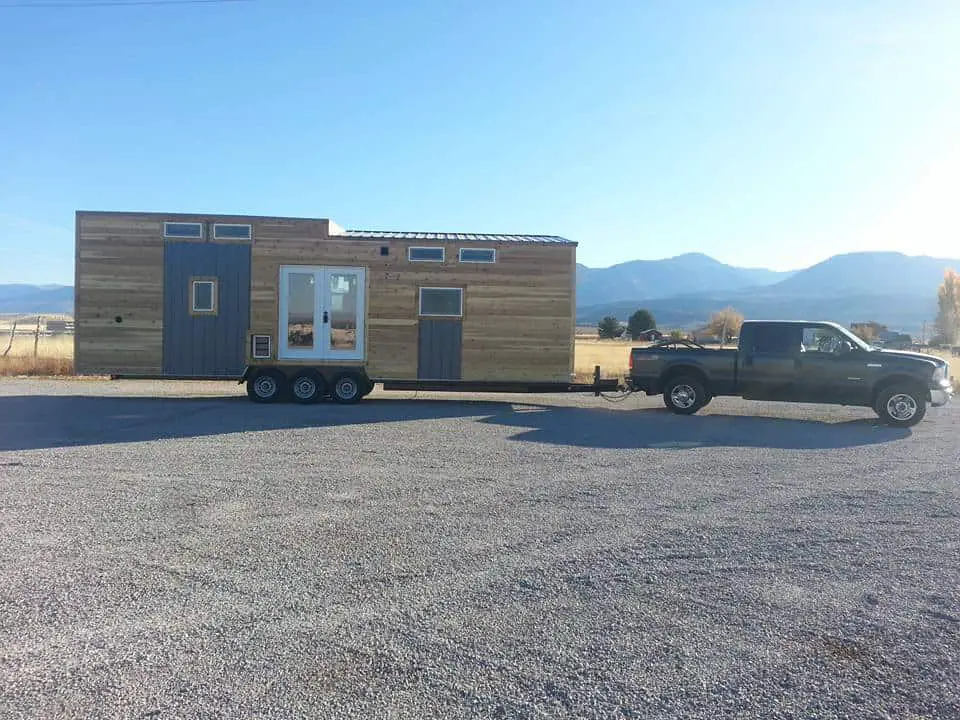
This is not a requirement, but extremely helpful. If your house is long, it is very hard to control, especially when a semi-truck blows past you on the interstate going 70 mph (112 kph). The sway can be too much for some people and if you can’t control it, you will flip your house and your truck. Anyone towing a house over 24 feet (7.3 m) long should have sway control on the truck.

Cost: Around $400-$800 in America

3. Install Aftermarket Gauges

When towing something heavy it is very important to keep an eye on all of your temperatures, not just the factory gauges. Having aftermarket gauges installed for longer hauls is a must.

Cost: Around $200-$400 in America

4. Upgrade the Cooling System

One of the differences between trucks with factory hitches and those without is the cooling system. You can add a hitch to any truck, but you also need to be sure that you upgrade your cooling system. Even if your hitch is factory, you need to test your cooling system and be sure it will be sufficient for the tow load.

Cost: Around $500-$2,000 in America

5. Ensure You Have a Good Flowing Exhaust and Intake

Again, this is another key component, especially on the long hauls. Take your truck to an expert and tell them your plans and what you want to be checked, including your intake and exhaust.

Cost: Around $500 in America

The House

After you are sure your truck is prepared for the haul, the next step is to get your home ready. Here are all the steps you need to take for this part.

6. Register Your Trailer

In order to tow any trailer, you need to register it, or at least get a temporary moving permit. This is something that may be easily forgotten because you think of it as your house and not a trailer. Be sure that you have a license plate on your trailer.

Cost: Depends on your local Department of Motor Vehicles and the way you register the trailer. To learn more about how to register your trailer, check out our page here.

7. Weigh It

You can take your house to a truck stop and use their scales. This is important for two reasons, 1.) you need to know how heavy it is for your truck’s capabilities and bridges but also 2.) you may be asked to show this if you are stopped. Towing over certain weights, depending on your location, will require a specialty license.

Cost: Around $15 in America

8. Check the Weight Distribution

If you plan on moving your house a lot, then this is something you need to plan from the beginning. This may determine where you put your wood stove or solar equipment when you are first building your home.

However, if you will not be moving your house much after it is set up then this is not a priority. Although you need to account for this when you are towing. Place some of your items in the lighter parts of the home to even out the weight.

Be sure to look out for this because the heavier parts of the trailer (front or back end) may start to sag or it may be difficult to maneuver when one side is heavier than the other.

9. Check Your Lights and Tires

This is standard for towing a trailer, however, since many people forget their home is also a trailer, they tend to also forget these things. Be sure you’re safe and operating properly when towing your home.

We knew someone towing a tiny house who did not check the bolts on the tires before he drove off. The bolts came loose and he lost the wheel. Safety is priority when towing. You need to check the bolts and the tire pressure.

10. Tighten Your Bolts on the Trailer

Not only do you need to keep an eye out for your tires, but you also need to check the structural integrity of your home. Often, after towing, bolts will loosen, from the constant shaking of being pulled up the road.

Check your trailer bolts every day you are towing. If they come to lose and you don’t catch it your house may slide or flip. We knew someone towing a tiny house across the country and one time they stopped hard and their house slid 6 inches (152 mm) on the trailer. A properly built house should not do this, but it can still cause problems if you let the bolts get too loose.

11. Check Trailer Brakes

Another common step that can be easily missed. Since you are towing something so heavy every little mistake can lead to a big one. Be sure you check everything, including the trailer’s brakes.

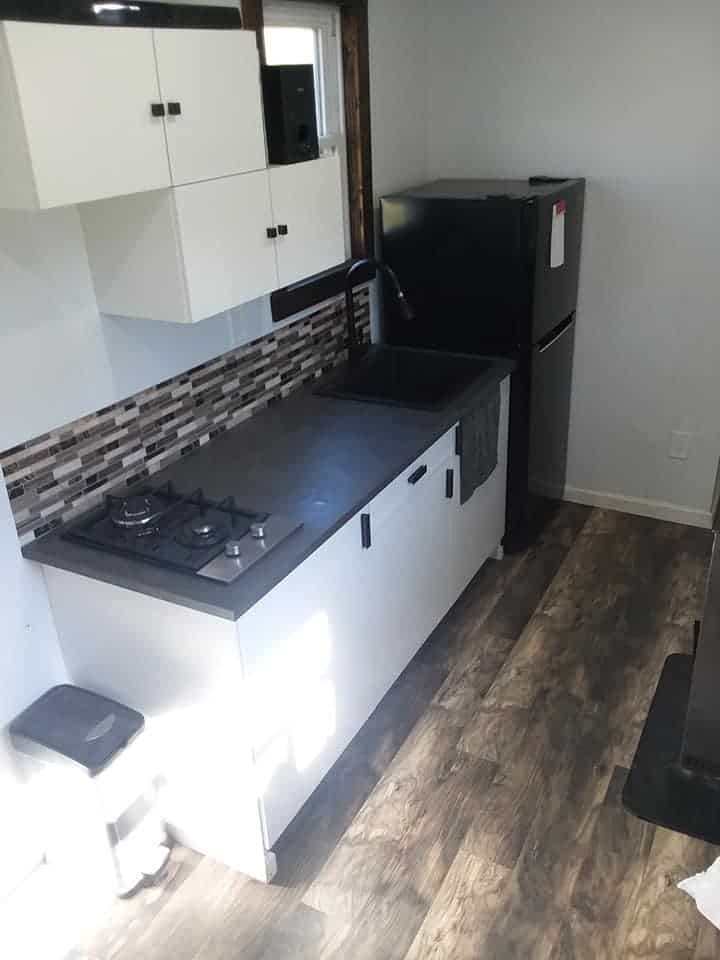
12. Tie Down Anything that Can Move (Including Ceiling Fans)

When moving your home you need to walk around and look at everything. Is there anything that can slide? Like your wood stove, anchor it to the floor. Is there anything that can fall? Like food in your cabinets, secure the doors or take it out.

Even things like ceiling fans need to be tied down. If they are free to swing about, the force may be so strong that they rip out of the ceiling.

We have moved plenty of times to know that if things CAN move, they will. One time our cupboard doors broke the tape we were using to secure them and flew open. Everything fell out. The glass broke. It took a couple of days for the smell of vinegar to go away.

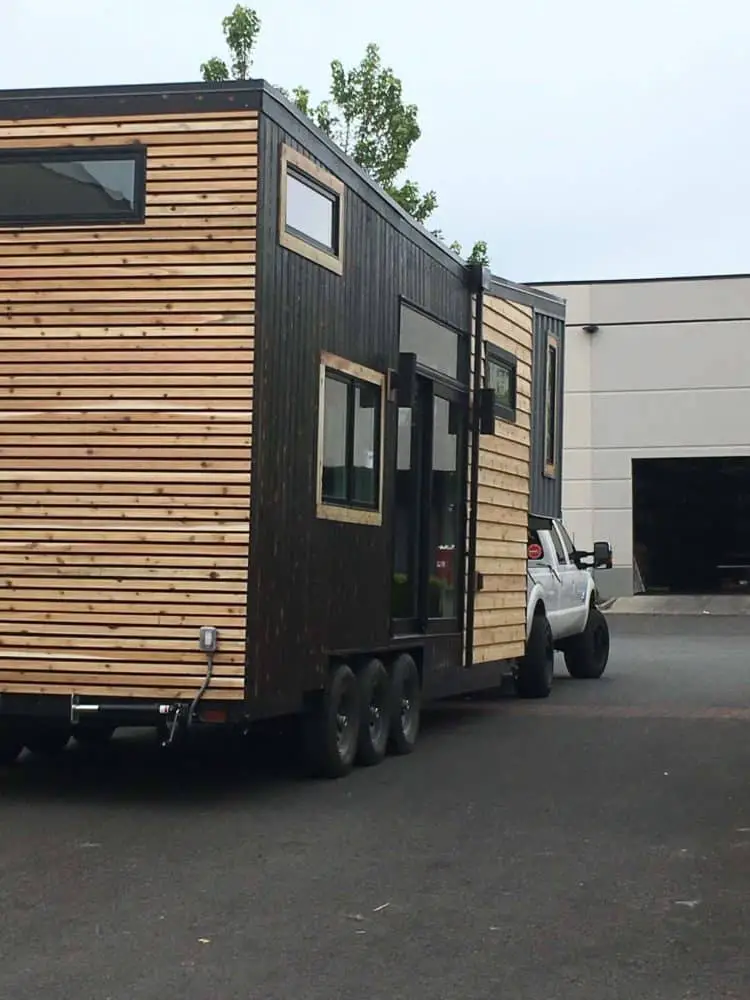
13. Remove Anything that Sticks out Past 8’6″ (2.59 m)

This will include exhausts, for example: your water heater, outdoor lights, or anything else. This is important because otherwise you can be considered a wide load, and there are way more restrictions for those.

It is best to just take the extra step of doing these things than to run into tickets or fines for not doing it.

14. Lock all Doors and Windows

Be sure you lock up everything before you start your journey. You would not want these to accidentally fly open going down the road. Another concern is if you stop to get food or something else and forget about your house. Anyone could walk right in. Remember this is your home (or someone else’s), so treat it like that.

The Route

15. Put in Your GPS No Low Bridges (None Lower than 14′ (4.3m))

Make sure you have your route picked out in advance and you have prepared for the height. Sticking to highways and main roads will help. But if you don’t know the area be very cautious of low bridges.

16. Check the Weather, No HIGH Winds

Of course, checking the weather is always a good idea, but be sure to check for winds too. I live near lots of roads that do not allow a trailer longer than 6 feet (1.8 m) through in high winds. It will blow your house over. Check the places along your route where this could be a problem. Although you don’t want to tow a 20,000 lb (9070 kg) house on any road with high winds.

17. Do Not Pull Over 65 mph (105 kph)

Of course, you need to be cautious when towing heavy, and it is not a good idea to drive too fast. Turns that come up faster than you expected, potholes, or gusts of wind can all throw you off. Be safe and drive slowly.

18. Be Careful on Steep Approaches

This is important when pulling into gas stations or some other stops. If you scrape the bottom of your home you may damage the plumbing. Even besides that you would be scrapping up your tiny home. Try to go in at an angle if you have to go up a steep approach.

This is especially important and more commonly damaged on longer homes.

Setting Up

19. Level Out Your Home

If you are staying somewhere temporary then you can just use jacks and level out your house using a level. If you are somewhere more permanent you will still need to level the house correctly, but now you should place it on blocks on whatever structure you are using for support. It is not recommended to leave your house for a long period of time on the tires alone. It can damage the tires and your home will sway when you move too much in it or with the wind.

Keep in mind that you may have to recheck the leveling a few days later after it has had time to settle.

20. Reinstall Exhausts or Anything Else Taken Off

This is your last step! Reinstall anything you removed, untie your items, and put everything away. You are done!

Cost

These are prices are based on our experience in America and will vary depending on your location. But this can give you a good starting point.

Upgrading Hitch, Receiver, and Ball: $850-$1,050

Sway Control: $400-$800

After Market Gauges: $200-$400

Upgraded Cooling System: $500-$2,000

Good Exhaust and Intake: $500

Weighing it: $15

Fuel: You will need to calculate this based on fuel prices and distance. You will get, on average 7-9 miles per gallon.

Total Cost: $2,465- $4,765, not including registration and fuel.

Now keep in mind that your truck may not quite need all of these things, especially if the tiny house is very light. Find more information about the average weights of different-sized tiny homes, and how to make them lighter, on our page here.

However, typically you will need to do almost all of these things in order to properly tow your house. It would be a bad idea to skimp on the costs here and blow your engine, costing you more in the long run.

As you can see though, the price can add up quickly before you even take into account your fuel costs. If you are going to be moving your house a lot then this way will definitely be worth it in the long run. However, if you are only wanting a one-time move, to take your tiny home to a permanent location then it may be a better idea to simply hire a company to move it.

We have moved tiny houses for years now and we have seen smooth trips and rocky ones. Take our advice and follow all of these steps, even if it seems costly. You will be grateful you invested in sway control when you are going downhill with semi trucks blowing past you and you are fighting for control.

Having your house flip over on the highway because you did not invest in sway control is not worth the $400-$800 you could have saved.

Hiring a Company to Move Your Tiny House

If you do not feel comfortable moving your home yourself then you should look into hiring a company to do it for you. For these companies will you be paying at least $2 per mile, and sometimes more. Here’s a good website for finding a tiny house moving company.

If this is going to be a one-time move, then hiring a company may be more cost-effective and likely save you time as well. Another company will already have their trucks set up and the experience needed.

However, doing your research in this area will definitely come in useful. Making sure you have a reliable experienced driver could mean the difference between your home making it to its new location on not.

We hired a driver one time to move our home quite a distance and he did not know what he was doing. We found scrapes on our house when we got it and other things we had to fix. On top of that, he left it parked overnight, without the truck, and it was towed and he charged the bill to us.

Then he lost a wheel because he did not check the lug nuts before he left, which is extremely irresponsible for a truck driver. He took our home to a shop that replaced the wheel but used too big of bolts and cracked the wheel hub. The driver then paid them and took it to a different shop that actually fixed it. Again he charged us for both of these bills that were his fault.

In the end, it was a terrible experience and we decided we would never pay someone to move our home again. Be sure that you do your research and that the drivers have good reviews.

Also, be sure that you understand all of the requirements. For example, a trucking company will likely charge you by the hour if they show up and your home is not ready to be moved yet. Ask lots of questions when you hire someone and do some research.

Our Travels

We have lived in three different tiny homes now, two of which were mobile. We have been traveling around, living tiny, and off-grid for almost 4 years now. My husband’s father has been a truck driver for many years, so my husband already had a good idea of how to tow most anything.

I remember the first home we built. David took his truck to get an upgraded hitch installed and sent me out to find a 20,000 lbs ball to use as well. Being that it was our first home we did everything we could to make sure it was done right.

That home was built in Las Vegas, NV, and then moved around in Utah. We lived in Utah, in our tiny house, for almost a year. In that time we moved our house to about five different locations. We became pros at being able to up and move.

We then moved it to Virginia. This is where we paid someone to move the house most of the way, due to our truck having more issues.

After we relocated to Virginia we moved the house around a couple of times, until we sold it. When we sold our home we also transported it to the buyers’ location as well.

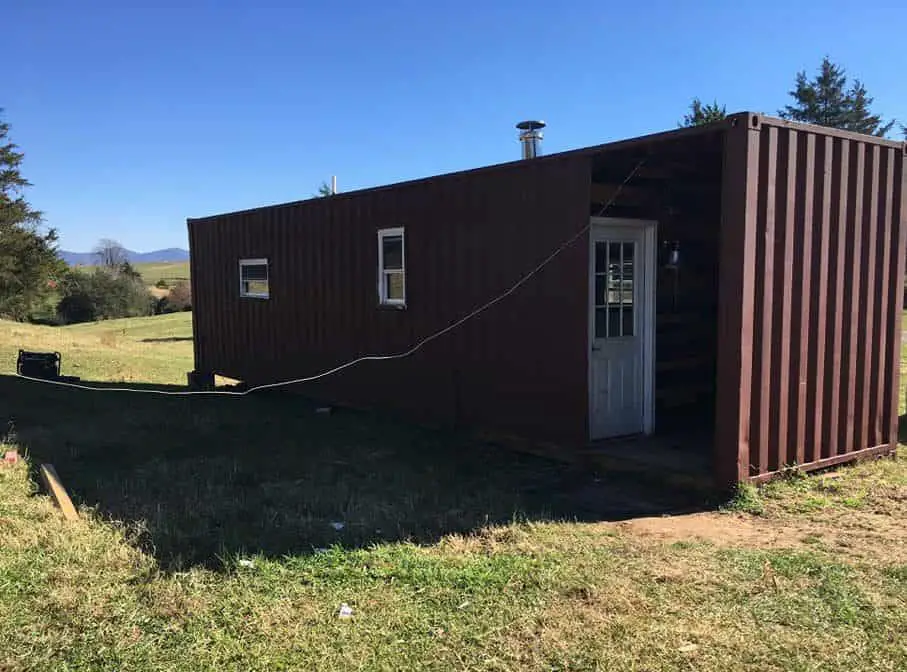
Our next house was a container home, which we built in Virginia.

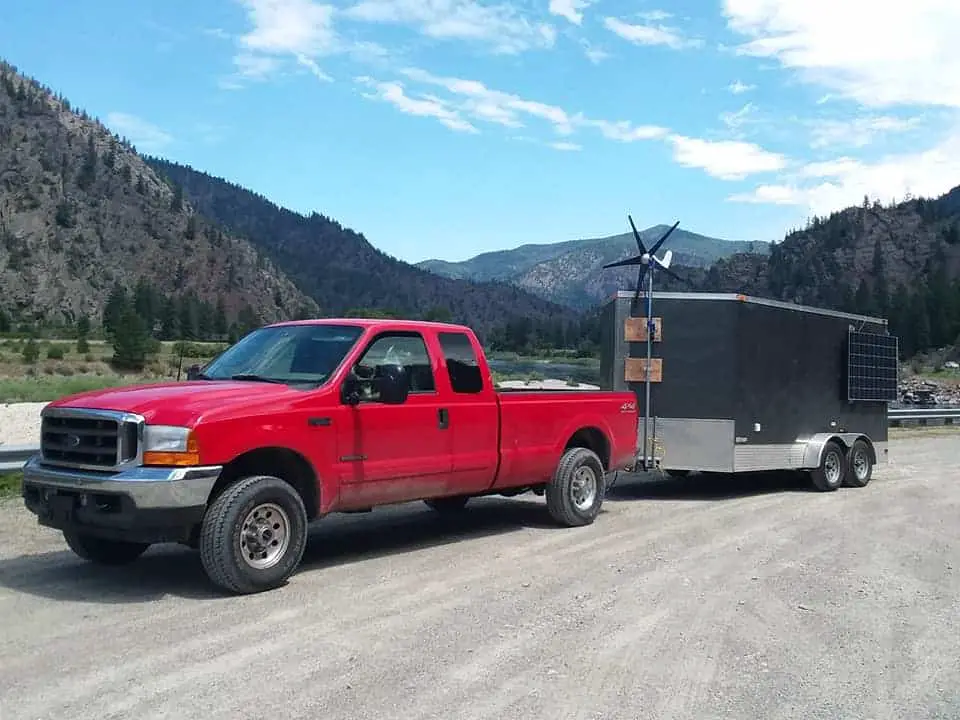
After that, we had some great opportunities to move out west again and decided to go for it. Our plan this time was to build something really small and easily tow-able so we could move and travel around. We bought a 14-foot (4.3 m) cargo trailer and went to work.

This has been our “temporary” (now over a year!) traveling home. It works great for vacations and has been the best for all of our moving. Given the size, we have even towed it with an old jeep. However, it is not as spacious for long-term living.

We have bought land out west and are now in the process of building a small house on a foundation. Given that tiny houses are not legal in the county we live in, it will have to be 650 sq ft (60 sq m).

We are still planning to do lots of traveling, so we will have our current mobile tiny house, and then our home on a foundation. This home is by far the easiest to tow. We simply fold down the solar panels, take everything off of the counters, and head out.

We bought the trailer in Virginia and towed my car in it out to Vancouver, WA. We then moved around a few times until we found somewhere more permanent to stay.

We rented a small spot for a couple of months but then we found a better opportunity at my husband’s work. He had started working for a large tiny house company and they had room for us to stay, in exchange for us helping keep an eye out on their property in the evenings and weekends. They had had some theft, so the situation was mutually beneficial.

This was near Portland, OR. There we finished building out the trailer and turned it into a home. Also, given my husband’s job, he transported tiny homes to their new locations as well.

We took our home on vacation to Glacier National Park in Montana and Crater Lake in Oregon. It was so convenient to just move some items around and then leave. We didn’t have to worry about packing or forgetting something, we had everything with us.

We then moved our home to Reno, NV. Again we moved around a couple of times until we bought land and are now on our journey of building a new home.

Overall, we have been transferring different types of tiny homes for years now and have lots of experience in the subject.

Photos: Living in a Tiny Home Off-Grid, What it Actually Looks Like

This article has been reviewed in accordance with our editorial policy.

My husband and I have been living tiny for almost 4 years now, the entire time living off-grid. We have built and lived in 3 different types of tiny homes, and have been traveling the whole time. Here is a look into our actual lives, and what it’s like living tiny and off-grid.

Daily Routines

You can still have a normal life, living tiny. Every day I get up and feed the dogs, plan my day, workout, shower, make food, and so on. Just because you have a smaller house doesn’t mean you cant have a normal life. We also get to spend a lot more time outside.

I am still able to do home workouts in my tiny home, go for bike rides, meal prep and plan my busy days. I get plenty of exercise and work done at home.

Moreover, living off-grid is a little different, we have some additional tasks and responsibilities. For example we have to empty our composting toilet and monitor our batteries. If we want to use the microwave, but our batteries are too low, we have to start the generator.

Work Life

Working from home is achievable too. We use a WiFi hot spot for our internet, which works well, depending on our service. This is especially great for traveling or living somewhere without an address.

I am currently a grad student, and also a teaching assistant. So typically I to my school every weekday, and just work from home on our business and my personal life. However, as I am writing this, we are in the midst of COVID 19, and I am talking classes and teaching online.

This may seem overwhelming, to work from a tiny home, although I do not feel that way. I have worked on lots of projects from home and getting to spend more time with my dogs is always a bonus. Working from home is completely possible, in a tiny house, even if it is very small.

Weekend Fun

As I spend time looking through my pictures to show you an accurate representation of my life in a tiny home, I see mostly out doors pictures. My dog watching the horses, a campfire, the mountains, and so on. We get so many opportunities to live with nature, which a large part of our lives.

When we lived in an apartment in the city, we had to plan a time to go out and do something. But now we just hop in our jeep, drive 10 minutes down the road, and prop our feet up by the lake.

Living in a tiny home, has changed the amount of time we get to be in nature. Most of our weekends include some sort of adventure.

Vacations

One of my favorite parts of living tiny, especially in our current home, is that ability we have to travel and vacation. It hes been great to be able to clean up your home and just drive away with it. Within the a year, we have taken this house to Glacier National Park, Crater Lake, and many other places in Washington, Oregon, and Nevada.

Our Other Tiny Houses

The Maverick

The Summit

Complete Guide to Cooking in a Tiny House: With Recipes

This article has been reviewed in accordance with our editorial policy.

People often wonder what it’s like living in a tiny house. What are the differences in daily tasks and how does it feel? My goal is to help as many people as possible understand what tiny house living is like and get rid of as much misinformation as possible.

So, what is it like to cook in a tiny house? The only difference between cooking in a tiny house versus a regular house, is that you use less appliances, have less counter space, and smaller appliances. You can still make lots of great food if you follow these simple tips and recipes.

My husband and I have been living tiny for almost 4 years now! And I have been cooking the whole time. I have cooked in regular homes and in tiny homes, and I prefer it tiny. Let’s look at more information about tiny house cooking.

How Cooking in a Tiny House Works

Let’s look into some myths and facts about cooking in a tiny house.

Since your kitchen is tiny, you cannot cook a lot, so you have to cook all the time.

Myth 1

People often think that you can’t cook very much in a tiny house, so therefore you would have to cook all the time. This is simply just not true. I meal prep every Sunday for my lunches over the next several days, and I have made lots of food in our tiny houses.

It is simple to cook in a smaller place if you just understand how to do it properly. You cannot expect to have 13 knives and 11 different appliances. You need to be able to cook full meals with just a few pots and pans.

I think space is less of a concern than people realize. When we had a big fridge, it was full. When we lived in a normal house, I used the whole counter top. Now that we have a small fridge, it is full. And I use all of the counter space I have now. But I don’t feel like I am missing anything. Instead I put more things away when I am done, we eat up leftovers faster. We have no need to have anything bigger, but if it is there we will use it.

As far as time goes, I usually spend Sunday’s doing a lot of cooking, and then a little time cooking on Friday or Saturday. Just depending on the food I planned for the week. I make dinners regularly, but we also have leftovers, and I use a Crock Pot about once a week for two dinners.

You need a nice kitchen to make good food.

Myth 2

This has always been interesting to me. People tend to think a bigger house will make them happier, more money will make them richer, and a nicer kitchen will make their food better. Frankly none of these things are true. Like Dom, said in the Fast and Furious, “He knows it doesn’t matter what’s under the hood, the only thing that matters is who’s behind the wheel.”

The cook is who makes the food good, not the Panini press or the fancy salad bowl. Of course, having helpful tools can always be convenient, but you can still cook great food with only a few things.

Appliances

So what do you need in a tiny house to cook? Well really you only need the basics to cook food, but having a few extra things comes in handy. What I have had in our tiny houses is a cook top, oven (sometimes), crock pot, microwave, one pan, three pots with lids, hot pads, a spatula, a few knives, cutting board, peeler, can opener, garlic press, measuring cups and spoons.

Cook Top

There are a few different types of cook tops you can get. I recommend gas, but sometimes electric is a good idea too. Most tiny hoses use a propane cook top, and I personally feel those are the best. The are very efficient on power, so you have less concerns living off-grid as well. But you will have an additional propane bill to consider.

Some tiny homes, who do not care about power usage or do not want to use propane at all, go with an electric cook top. These can work great as well.

When we moved into our first tiny house, our kitchen wasn’t complete. We didn’t have an oven or cook top. So we went to a sporting goods store and bough a camping propane cook top. We ended up using it for a year and it worked great. We would just buy a small bottle of propane every now and then to refill it.

That cook top was a two burner and I don’t think I have ever used more than two burners at a time, even when I had four. Almost all the meal I make only need two pans. Even if I need three, it is usually too much going on at one time and I wait until I am done with one pan to start another.

Microwaves

Microwaves are common in tiny houses, but less so in off-grid homes. We use our microwave a lot, but we have gone without before and that worked too. It is really up to your preference, but microwaves do use a lot of power. If you are off-grid or concern about your power usage, they are not the best tool.

When buying a microwave, look for very low wattage. Tiny houses are small, so they can only fit so many circuits and breakers into one house. You will not likely be able to turn on your electric cook top, mini-split, AND microwave all at the same time.

Having lower wattage is better, but you need to keep in mind that you should turn some things off when you turn others on. This is especially true to off-grid systems!

Ovens

Ovens are optional, although a lot of tiny homes still have them. This will completely depend on your lifestyle. Having one can be nice, but if you rarely use it than that place may be better suited for storage.

There are multiple types of ovens you can get, again think about your power usage. We bought an RV oven for our first home, it was small and ran off of propane.

In our current house, which is meant to be for temporary living, we needed something really small. It is only 112 sq ft (34 sq m), so we have to be creative. We ended up buying a one burner electric plug in cook top. So far it has worked well. It takes longer to heat up and uses more electricity than we had planned on. But I have still cooked lots of meals in our tiny house. However, it does take me a little longer because I can’t cook two things at the same time.

Tips for Cooking in a Tiny Home

Here are some handy tips I have picked up by cooking in a tiny house over the years.

1. Use One-Pot Meals

As I mentioned, I currently only have a on burner cook top. So for me, one pot meals are great! But even if you have a little more room, confining your meal to one pan saves space and just makes it easier.

I typically cook a meal and then a side, so I usually need two pans. But it is always nice to only need one!

2. Use Crock Pot Meals

We do a crock pot meal about once a week. Typically it’s thrown together on Monday morning, and then we have dinner for Monday and Tuesday night with minimal work.

Some great ideas are to do a pork of beef pot roast. You can cook a lot of food with minimal effort and have left overs for a couple of meals.

3. Clean and Prep while You Cook

This is key. Whenever one item is cooking, I am prepping, putting stuff away, or cleaning up. This not only saves space while you are cooking, it saves so much time. If you wait until the end to clean and put everything away it will take forever to cook.

This again is one of the benefits of living tiny. I never did this when I didn’t live in a tiny house, and I liked cooking so much less. I felt like it took forever to make dinner and clean up.

Now I love cooking. Now that I live tiny, I am forced to adapt good habits without even noticing it. I have to clean up while cooking, so I have room. This shortens my cooking time and makes it such a better experience. Unknowingly, I have adapted several healthy habits living tiny that make my life so much better and healthier.

4. Don’t Have Too Many Dishes

Living in a tiny house limits you on space. You don’t have room for lots of dishes anyway. However, we choose to have just enough. Recently we only bought two plates, for my husband and me. So now every time we eat we have to wash the dishes. This drastically helps minimize the dishes in your sink at any given time and helps you clean more often.

Since we started using less dishes my house stays so much cleaner! Again, this is another healthy habit that I unknowingly adopted. I constantly keep my kitchen clean and put everything away, since there are only a few things it seems like such a simple and easy task.

5. Meal Prep

I know that meal prepping is not for everyone, but I think it is a good idea. I usually make 3-4 days of my lunches on Sunday nights. Then I have less cooking and still have all homemade food. Cooking in bulk is just a time saver. But is also really helps when you have a small kitchen and you don’t want to cook twice a day in it.

Feeling like you always have to cook may be a downside for many people. But you can still make bulk food in a tiny house, make some extras for the next day or two and you will feel more comfortable with your kitchen. Of course it is always a good idea to cook most of your meals instead of eating out, so having extra on days you are too tired also helps a lot!

Tips for Grocery Shopping in a Tiny House

Most tiny houses will have smaller refrigerates, cabinets, and overall storage for food. It may be an adjustment to learn how to go grocery shopping for your tiny house. Having less room for food does not mean you have less food, it only means that you eat what you do have.

There are some simple tips I can give you that I have learned over the years of living tiny. But mostly it comes down to eating the food you have. If you leave cans and packages in your cabinet for a long time and just keep buying more, you will have a hard time living in a tiny house.

I keep a few back up meals in my house of canned or packaged foods, but I do not keep buying more. You can also keep lots of different ingredients to make all types of foods, but you just need to use them up as you buy more.

I tend to buy somethings I only use for a couple of meals, for example sour cream, and then I make those few meals over the next couple weeks. And then I won’t buy more sour cream for another month or longer. For me it is just easier to go in phases.

You will also need to eat up your meats faster, since you will not likely have as much freezer space. This means you will be eating fresher food too.

The basics are to make sure you eat up the food you have and don’t buy too much, so that you can. We go grocery shopping once a week and have plenty of food.

Our typical week of eating:

Breakfast– We sometimes eat eggs and bacon, or something similar

Lunches– My husband doesn’t eat a whole lot at work, so some sandwiches maybe. I pack a few meals, for example creamy chicken salsa. And then I will take some boiled eggs or a salad on Friday for lunch.

Diners– Monday- Crock Pot Meal. Tuesday- Crock Pot left overs. Wednesday- We buy tacos. Thursday and Friday- Usually through together some food one day and cook a diner the next. Saturday and Sunday- This is right after grocery shopping, so we will eat something we just bought, like stake and potatoes.

Our typical grocery list:

Based off of all of that food, I will usually buy something like the following

  • Stake
  • Chicken
  • Pork Roast
  • Potatoes
  • Broccoli
  • Rice
  • Salsa
  • Beans
  • Corn
  • Bread
  • Sandwich meat
  • Cheese
  • Eggs
  • Bacon
  • Toppings
  • Drinks
  • Snacks

1. Create a Meal Plan

I know this can be difficult and time consuming for those who don’t do this, but in the end it will save you time and headache. Just write down 4-5 dinner and lunch ideas throughout the week and the ingredients you are missing.

Then when you go shopping you have a good idea of the foods you will need to buy for that week. Also, buy some extra food that you know you or your family will eat, then you have food on the days you didn’t plan for.

What this looks like for us:

I usually plan a crock pot meal for dinner on Monday and Tuesday, so I will buy a pork roast and some potatoes. Then I know we will have tacos on Wednesday night, I’ll plan a meal with chicken and rice, stakes and mashed potatoes. And then decide on some lunches for me.

Around that I will buy food I know we eat a lot, like eggs and bacon, snacks, and sandwich materials.

2. Keep Most Drinks Outside the Fridge

If you have a very small fridge like we do, than this will help a lot. You can keep water bottles, beer, energy drinks, and more in your cupboards. Then just place a few a day in the fridge, this will drastically save on space if your family likes to have a lot of drinks.

We have been doing this for years and I love it. I put in whatever we will need the day before, and then we have all the drinks we want without drinking them too fast or taking up too much room. This is a great way to buy bulk in things like energy drinks, which are much cheaper that way.

3. Plan Meals around What You Already Have

Once every couple weeks, I look around at what I have (this is really fast and easy in a tiny house!) and I plan a couple meals to use up those items. If I have just a little bit of soy sauce left, I will plan a meal with that.

This is an easy way to minimize your cooking items without wasting or feeling like you don’t have what you need. You can still use up all of your food without having 12 half empty bottles taking up space.

Of course you should keep around that things that you use a lot. I use lots of seasonings, so when one is empty up I buy another right away so I am not missing it when I cook something else.

This works best with the other tip of meal planning. When you know what you want to make you can see what you have and what you need. You should not always buy everything so you have it just in case, it is better to stick with what you need for that week. Unless it is something you use frequently.

Recipes

Here are some great recipes, that are easy to make in a tiny house, and that my family loves!

One Pot Cajun Chick Pasta

Ingredients

Cajun Seasoning

  • 2 tsp Smoked Paprika
  • 1 tsp Thyme
  • 1 tsp Oregano
  • 1 tsp Garlic Powder
  • 1/2 tsp Onion Powder
  • 1/4 tsp Salt
  • 1/4 tsp Black Pepper
  • 1/4 tsp Cayenne Pepper

Meal

  • Olive Oil
  • 1 1/2 Tbsp Butter
  • 1 lb Chicken Breast
  • 1/2 lb. Penne Pasta
  • 2 Cups of Chicken Broth
  • 15 oz. Canned Cherry Tomatoes (Optional)
  • 2 oz. Cream Cheese
  • Sliced Green Onions

Directions

  • Combine all ingredients for the Cajun seasoning and mix with cut up chicken breasts.
  • Heat oil and butter until they are melted and bubbly. Fry chicken for a couple of minutes on each side.
  • Add in tomatoes, pasta, and chicken broth. Stir and cover, on high heat.
  • Once the broth boils, reduce to low heat and simmer for about 11 minutes, or until pasta is tender.
  • Slowly add the cream cheese and top with green onions.

Stake Tips

Ingredients

Sauce

  • 2 Tbsp Worcestershire Sauce
  • 3 Tbsp Brown Sugar
  • 1 Tbsp White Vinegar
  • 1 Clove of Garlic
  • 1 tsp Garlic Powder
  • 1 tsp Onion Powder
  • 1/2 tsp Oregano

Meal

  • 1 lb. Stake
  • 4 Brown Mushrooms, Chopped
  • 1/4 Onion, Chopped
  • Broccoli (optional)

Directions

  • Combine all ingredients for the sauce and mix well.
  • Place sauce in a frying pan on medium-high heat. Cook sauce until it is think and bubbly, about 3 minutes.
  • Place 1 inch sized chunks of stake, mushrooms, and onion into the sauce on high heat. Cooking the outside quickly to leave it crisp and the inside juicy. Cook until stake the way you want it.
  • Usually served with steamed broccoli.

Creamy Chicken Salsa (Perfect for Meal Prepping)

Ingredients

Seasoning

  • 1 tsp Chili Powder
  • 1 tsp Cumin
  • 1/2 tsp Garlic Powder
  • 1/4 tsp Salt

Meal

  • 1 lb. Chicken Breast
  • Cooking Oil to Coat the Pan
  • 16 oz. Jar of Salsa
  • 15 oz. Can of Corn
  • 15 oz. Can of Black Beans
  • 1/3 Cup of Sour Cream
  • Some Cilantro for Topping and Rice
  • Some Queso Fresco for Topping
  • 5 Cups of Cooked Rice
  • 1 Lime

Directions

  • Gently pound chicken until it is even in thickness, to help the chick cook quicker.
  • Combine all seasoning ingredients and coat the chicken.
  • Fry the chicken in an oiled pan until it is cooked through.
  • Place the chicken on a cutting board, and add the salsa, corn, and black beans to the same pan, cooking in any left over seasoning.
  • Cut the chicken into strips and allow the salsa to come to a boil and simmer on low for 8-10 minutes.
  • Slowly add the sour cream and stir.
  • Add some cut cilantro and the squeezed lime juice to the rice and mix.
  • To serve, pour the creamy salsa over the rice, place chicken on top and top with cilantro and queso fresco.